A Parfocal
Eyepiece Holder that can be swapped as easily as a camera --
and costs next to nothing to make...
NOTE: This "invention" can also be used to adapt a favorite old telephoto camera lens
into a small telescope. Just attach it to your favorite old telephoto!!!
Two of the
challenges of astrophotography with a DSLR are finding and focusing on the
subject. Especially with the small, dim viewfinders of the typical DSLR
camera, it can be a challenge just to locate some objects. And the typical
focusing screen is
way too small and gets only the roughest of focus.
These
problems can be addressed in several ways: a parfocal eyepiece is the easiest.
However, my favorite camera adapter must be unscrewed from t-mount adapter, or
from the scope itself, in order to swap the camera for an eyepiece. And my Newt
must be used with a Para-Corr (shown at left), which again requires screwing many turns to
mount and remount the camera. (Other alternatives with the newt also involve
several manipulations more than I care to make. )
What I really wanted was a
parfocal eyepiece holder that could be
mounted or removed as easily as my camera--simply using the existing bayonet
mount.
I had a
device for my old
OM-1 that featured the female part of the lens/camera mount on
the front of a simple 1.25 eyepiece holder. The adapter worked the same as
the front of the camera, and allowed me to leave the T-mount adapter in place in
the focusing tube when I swapped the device for the camera. With an eyepiece in
the holder, I could find and focus, swap out the device, and swap in the camera
to take the picture. There
did not appear to be something similar for my Canon Eos mount (at least at any
price I was willing to pay).
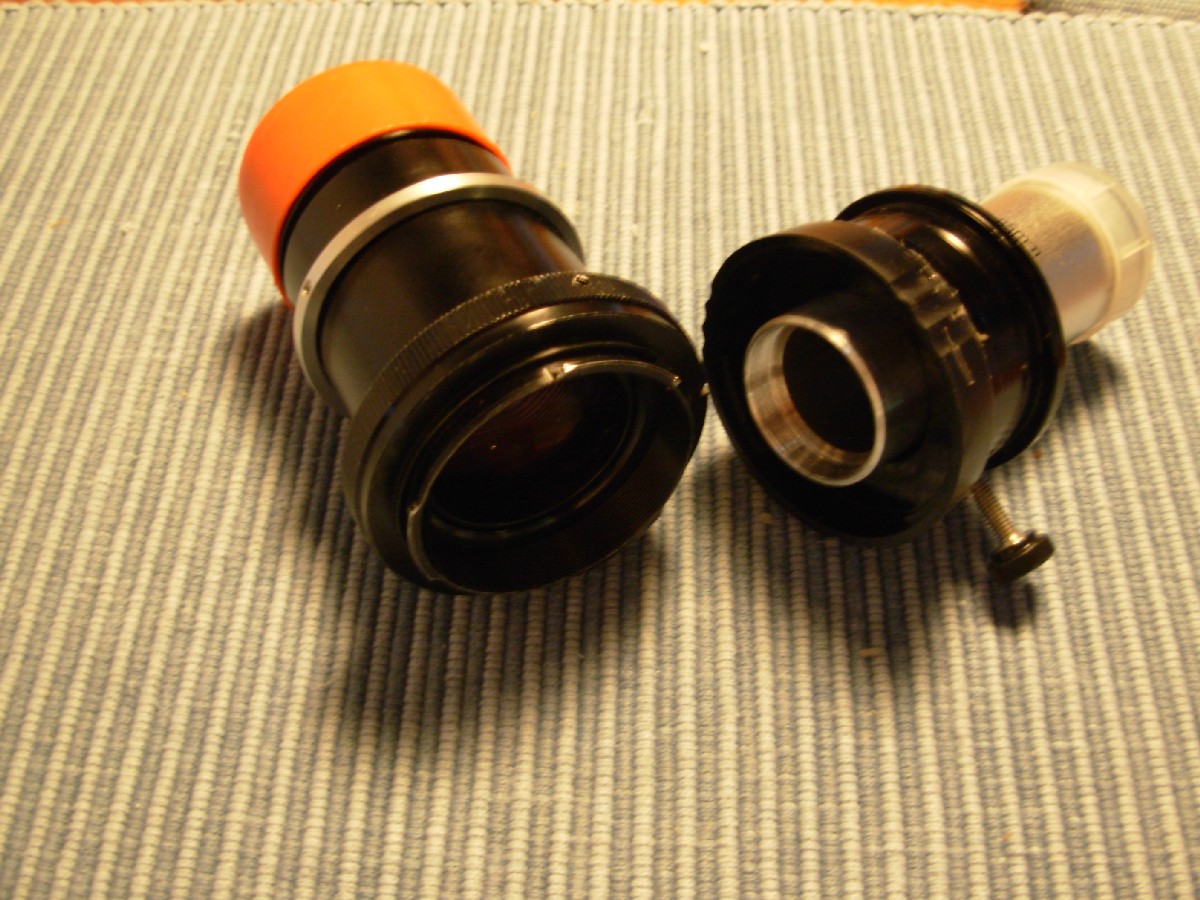
So, I made
one from a rear lens cap (whose business end is shaped the same as the front of the camera)
and a spare 2 inch to 1.25 inch adapter.
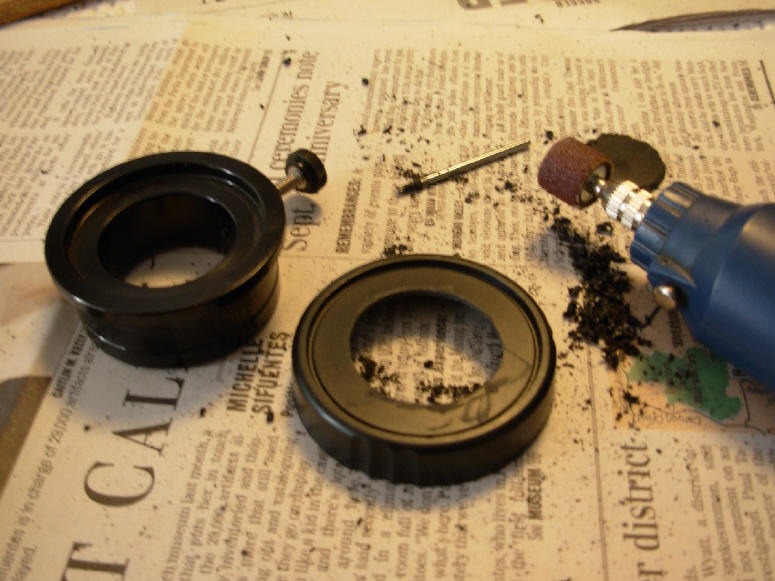
The
procedure was exceedingly simple. Simply cut a 1.25 inch round hole in the
middle of the rear lens cap (using a razor blade, x-acto knife, and Dremel moto-tool
as needed). Then glue it to the back of a 2 to 1.25 adapter (I used simple
household GOOP, but other glues would probably do as well).
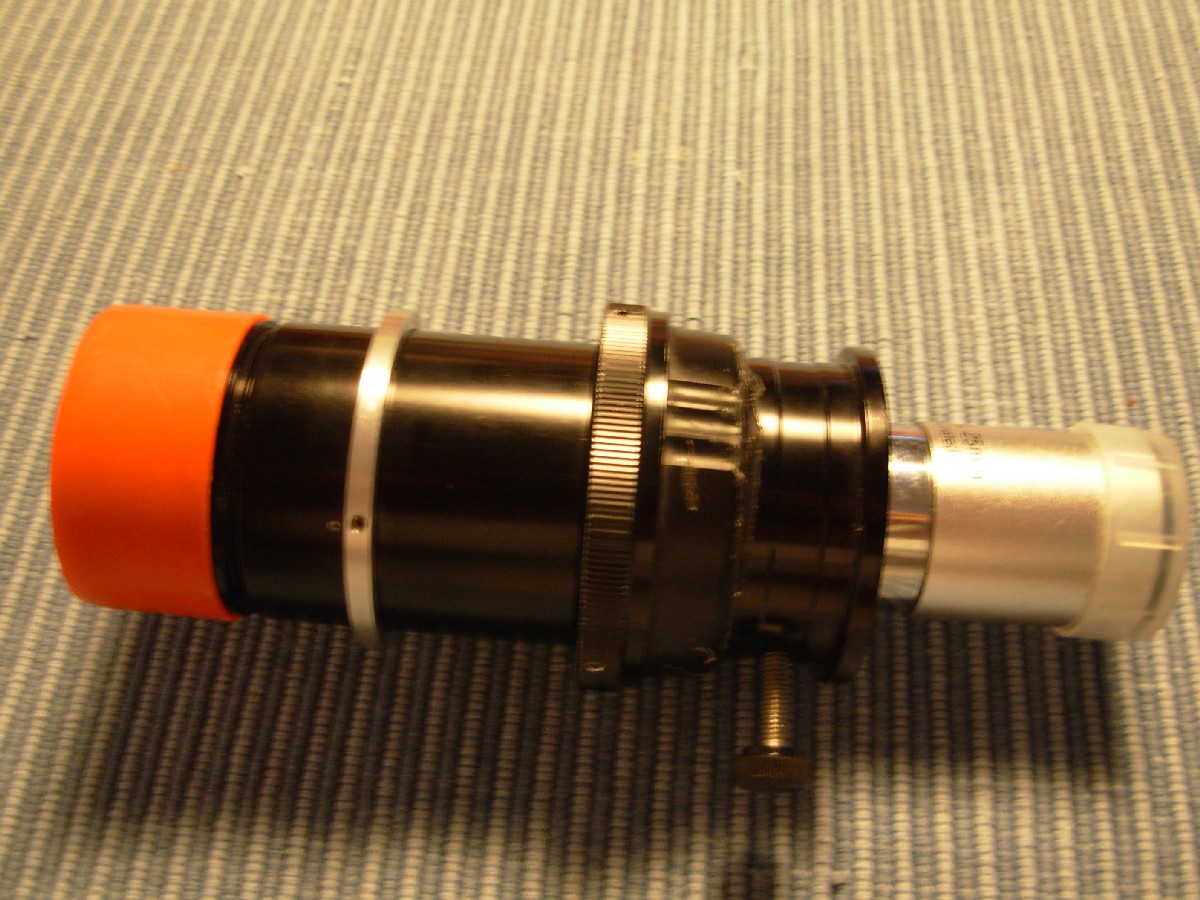
To
"calibrate" it, focus your camera as well as it can be focused in your scope.
Remove the camera from the T-mount. Attach the newly made adapter in its place.
Slide your eyepiece in and out until the image also looks as well focused as
possible. Tighten the setscrew, and you have a parfocal eyepiece that can be
swapped in and out just like the camera.
To use the
device, simply attach it where you would attach your camera. Find and focus your
target just as you would if you were observing visually. Then swap the
adapter/eyepiece out and your camera in and take the picture. (Note that I
usually go to a computer assisted focusing routing with DSLR Focus or Images
Plus before actually taking the picture--but this is be a good idea
whenever using a parfocal eyepiece regardless of how it is attached to the
telescope.)
Eyepiece
Notes: After you get
a perfect focus with computer-aided focusing on any given evening, you may want
to adjust the eyepiece in the adapter to assure it is parfocal. I use a simple
25 mm plossl for the best compromise of wide field of view, relative brightness,
and good focus. If you wanted to concentrate on focus, use a shorter focal
length. If you prefer using for finding, opt for the wider field of a
longer focal length. With a set of parfocal rings, you could actually swap
different eyepieces into your newly made adapter, and get the best of both
wide-field and high magnification as needed.
Materials
Notes: Get the
tightest fitting rear lens cap you can find. They cost about $7 new, at most
camera shops. You may want to experiment a little to make sure you
have a 1.25 adapter of the right height--that is, one that allows your eyepiece
to reach focus at some point in its attachment. After you have been in the hobby
for a while, one tends to collect 2 inch to 1.25 adapters and a few spare 25 mm
plossls that lend themselves to this handy device.
 adapter must be unscrewed from t-mount adapter, or
from the scope itself, in order to swap the camera for an eyepiece. And my Newt
must be used with a Para-Corr (shown at left), which again requires screwing many turns to
mount and remount the camera. (Other alternatives with the newt also involve
several manipulations more than I care to make. )
adapter must be unscrewed from t-mount adapter, or
from the scope itself, in order to swap the camera for an eyepiece. And my Newt
must be used with a Para-Corr (shown at left), which again requires screwing many turns to
mount and remount the camera. (Other alternatives with the newt also involve
several manipulations more than I care to make. )